A quickstart guide to the Ubuntu phone emulator


Following the initial announcement, the Ubuntu emulator is going to become a primary Engineering platform for development.
Quoting Alexander Sack, when ready, the goal is to
[...] start using the emulator for everything you usually would do on the phone. We really want to make the emulator a class A engineering platform for everyone
While the final emulator is still work in progress, we're continually seeing the improvements in finishing all the pieces to make it a first-class citizen for development, both for the platform itself and for app developers. However, as it stands today, the emulator is already functional, so I've decided to prepare a quickstart guide to highlight the great work the Foundations and Phonedations teams (along with many other contributors) are producing to make it possible. While you should consider this as guide as a preview, you can already use it to start getting familiar with the emulator for testing, platform development and writing apps.
Requirements
To install and run the Ubuntu emulator, you will need:
- Ubuntu 14.04 LTS or later (see installation notes for older versions)
- 512MB of RAM dedicated to the emulator
- 4GB of disk space
- OpenGL-capable desktop drivers (most graphics drivers/cards are)
Installing the emulator
The installation is as easy as opening a terminal, pressing Ctrl+Alt+T and running these commands, followed by Enter:
sudo add-apt-repository ppa:ubuntu-sdk-team/ppa && sudo apt-get update
sudo apt-get install ubuntu-emulator
Alternatively, if you are running an older stable release such as Ubuntu 12.04, you can install the emulator by manually downloading its packages first.
Installation notes
- Downloaded images are cached at
~/.cache/ubuntuimages–using the standardXDG_CACHE_DIRlocation. - Instances are stored at
~/.local/share/ubuntu-emulator–using the standardXDG_DATA_DIRlocation. - While an image upgrade feature is in the works, for now you can simply create an instance of a newer image over the previous one.
Running the emulator
The ubuntu-emulator tool makes it again really easy to manage instances and run the emulator. Typically, you'll be opening a terminal and running these commands the first time you create an instance (where myinstance is the name you've chosen for it):
sudo ubuntu-emulator create myinstance --arch=i386
ubuntu-emulator run myinstance
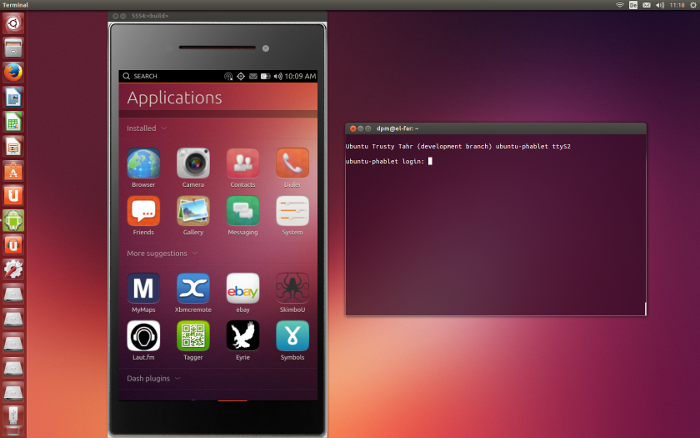
You can create any instances you need for different purposes. And once the instance has been created, you'll be generally using the ubuntu-emulator run myinstance command to start an emulator session based on that instance. Notice how in the command above the --arch parameter was specified to override the default architecture (armhf). Using the i386 arch will make the emulator run at a (much faster) native speed. Other parameters you might want to experiment with are also: --scale=0.7 and --memory=720. In these examples, we're scaling down the UI to be 70% of the original size (useful for smaller screens) and specifying a maximum of 720MB for the emulator to use (on systems with memory to spare). There are 3 main elements you'll be interacting with when running the emulator:
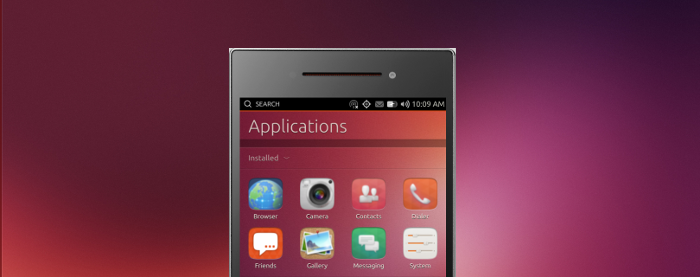
- The phone UI - this is the visual part of the emulator, where you can interact with the UI in the same way you'd do it with a phone. You can use your mouse to simulate taps and slides. Bonus points if you can recognize the phone model where the UI is in ;)
- The remote session on the terminal - upon starting the emulator, a terminal will also be launched alongside. Use the
phabletusername and the same password to log in to an interactive ADB session on the emulator. You can also launch other terminal sessions using other communication protocols –see the link at the end of this guide for more details. - The
ubuntu-emulatortool - with this CLI tool, you can manage the lifetime and runtime of Ubuntu images. Common subcommands ofubuntu-emulatorincludecreate(to create new instances),destroy(to destroy existing instances),run(as we've already seen, to run instances),snapshot(to create and restore snapshots of a given point in time) and more. Useubuntu-emulator --helpto learn about these commands andubuntu-emulator command --helpto learn more about a particular command and its options.
Runtime notes
- Make sure you've got enough space to install the emulator and create new instances, otherwise the operation will fail (or take a long time) without warning.
- At this time, the emulator takes a while to load for the first time. During that time, you'll see a black screen inside the phone skin. Just wait a bit until it's finished loading and the welcome screen appears.
- By default the latest built image from the
devel-proposedchannel is used. This can be changed during creation with the--channeland--revisionoptions. - If your host has a network connection, the emulator will use that transparently, even though the network indicator might show otherwise.
- To talk to the emulator, you can use standard
adb. The emulator should appear under the list of theadb devicescommand.
Learn more and contribute
I hope this guide has whetted your appetite to start testing the emulator! You can also contribute making the emulator a first-class target for Ubuntu development. The easiest way is to install it and give it ago. If something is not working you can then file a bug.
If you want to fix a bug yourself or contribute to code, the best thing is to ask the developers about how to get started by subscribing to the Ubuntu phone mailing list.
If you want to learn more about the emulator, including how to create instance snapshots and other cool features, head out to the Ubuntu Emulator wiki page.
And next... support for the tablet form factor and SDK integration. Can't wait for those features to land!
Away shirts can give supporters a different way to remember important matches when collectors use kit details to place a team in a particular period. Supporters of Atletico Madrid often compare home kits, away kits, and retro designs when discussing the identity of the club. When supporters think about matchday clothing, football shirts for national team fans is one way to link football history with the practical choice of a shirt. When names and numbers matter, the discussion stays close to teams, supporters, and shared history.